 Pin it
 The first time I attempted these Taurus Zodiac cookies, my kitchen was a cozy flurry of powdered sugar clouds and golden sparkle. The distinct scent of vanilla and a hint of almond drifted through the air, mixing with the anticipation of pulling out zodiac-shaped cookies with edges just beginning to turn gold. There was something undeniably satisfying about transforming simple dough into a playful edible tribute to astrology—especially knowing I'd get to paint the finishing touch in shimmering gold. A tiny trail of luster dust somehow even ended up on my cat's whiskers. There's magic in these extra steps, and it shows in every glittering bite.
Midspring, I brought a box of these starry Taurus cookies to a friend born under the sign, and we spent the afternoon debating astrology over crumbs and chamomile tea. She laughed when I confessed to nearly painting my fingernails with edible gold in my rush, and the cookies disappeared faster than the conversation paused. That moment is now my go-to reminder to always bake a double batch when astrology season rolls in, just in case friends drop by.
Ingredients
- All-purpose flour: Sift this for the perfect tender bite—skipping this step will make your cookies heavier, trust me.
- Unsalted butter: Start with warm, softened butter so your dough creams into something pillowy smooth; too cold, and you'll fight sticky clumps.
- Granulated sugar: A little extra time creaming this with butter makes edges crisp up beautifully.
- Large egg: Use room-temperature egg for easier mixing—a trick I learned after too many streaky doughs.
- Pure vanilla extract: Taurus loves refinement; real vanilla gives sophistication in every bite.
- Almond extract (optional): Swirling just a tiny bit in adds a bakery-style richness, or swap for citrus zest for a lighter mood.
- Salt: Just a pinch heightens the sweetness and makes the flavors sing out loud.
- Powdered sugar: Sifted, it ensures ultra-smooth royal icing without any lumps for that professional sheen.
- Egg whites or meringue powder + water: Both deliver beautiful royal icing—use meringue powder for peace of mind when gifting.
- Lemon juice: Brightens and sharpens the icing so it's never bland.
- Vanilla extract (for icing): Carries a whisper of warmth so the icing never tastes flat.
- Edible gold luster dust: The secret ingredient for those glittering zodiac constellations—apply with a steady hand and a fine brush.
- Clear alcohol (vodka or lemon extract): This evaporates quickly so the gold dries without streaks—the difference is night and day.
Tired of Takeout? 🥡
Get 10 meals you can make faster than delivery arrives. Seriously.
One email. No spam. Unsubscribe anytime.
Instructions
- Cream Butter & Sugar:
- Let the softened butter and sugar whip together until they morph into a pale, cloudlike mass with a subtle hum of the mixer. You'll know it's ready when it almost smells caramel-sweet.
- Add Egg & Extracts:
- Crack in the egg and drizzle in both extracts. Blend until just incorporated, watching the dough turn glossy and light.
- Combine Dry Ingredients:
- Gently whisk flour and salt together before slowly adding it to your wet mix—the kitchen will fill with that singular, buttery aroma.
- Chill the Dough:
- Divide the dough, pat each half into a disc, and wrap snugly. Tuck them into the fridge for at least half an hour to rest; impatient rolling leads to cookies that lose their shape.
- Roll & Shape:
- Spread a bit of flour and roll dough to a quarter-inch thickness. Use Taurus cutters or zodiac shapes and listen for the gentle thud as each shape lands on your baking sheet.
- Bake:
- Pop into a preheated oven and watch as edges turn golden in just about 12 minutes. Transfer to racks for cooling—they should feel firm but tender.
- Prepare Royal Icing:
- Beat egg whites or meringue powder with water until foamy, then slowly add powdered sugar. Add lemon juice and vanilla, whipping until you achieve glossy peaks that stand tall.
- Decorate:
- Fill piping bags and outline each cookie, then flood and let set. Prepare gold paint by mixing luster dust with alcohol, painting symbols and stars once the icing feels set and dry under your finger.
- Box Them Up:
- Arrange in a parchment-lined box, tucking in a Taurus card for flair. Stack gently to preserve those sparkling details—every gold swirl deserves its spotlight.
 Pin it
  Pin it
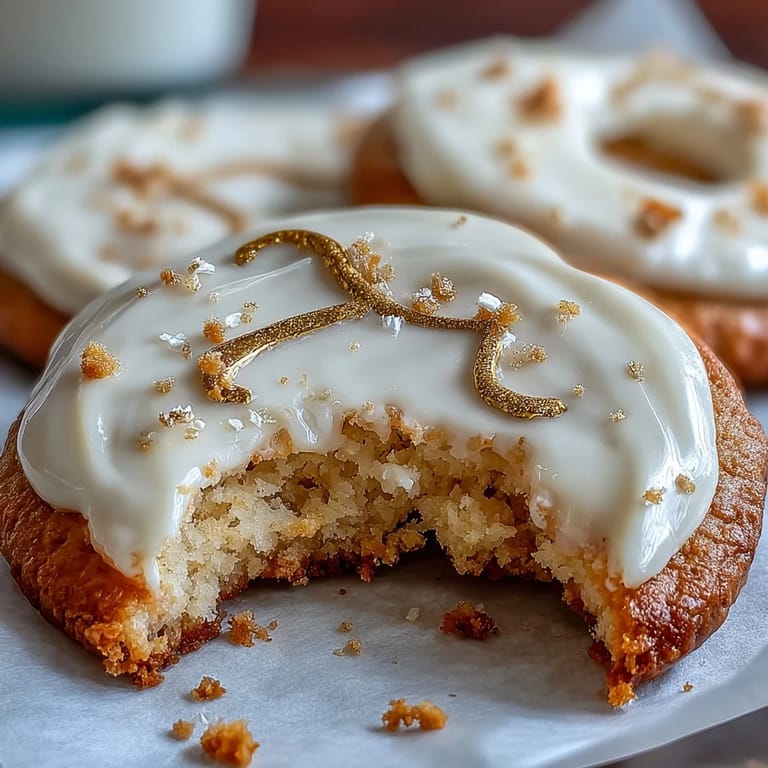
 Seeing someone pause mid-conversation to marvel at a golden-inked Taurus cookie is the kind of tiny joy that made all the sifting and painting time worth it. These cookies turn ordinary get-togethers into star-lit celebrations, sparking laughter and plenty of zodiac chat around the table.
Getting Zodiac Icing Just Right
The first time I tried painting gold constellations, I had to redo a few wobbly stars, but found that less is more—a single delicate gold line or dot elevates each cookie. If the gold mixture gets too thick or streaky, just add another drop of clear alcohol until it flows like paint. Overdoing it can smudge or wear through the icing, so always let each layer fully dry before adding another coat.
Packaged to Impress
I like to line cookie boxes with a crisp sheet of parchment, then nestle the cookies in gentle rows, sometimes slipping in a sprig of dried flowers for a more gift-worthy feel. Folding a simple zodiac-themed card or note inside turns your cookies into an experience, not just a dessert. Every detail, from gold swirls to careful boxing, lets the person unwrapping them know they're special.
Troubleshooting at Cookie Time
Sometimes the dough feels sticky, and dusting with a little extra flour can save the day. If your royal icing isn't stiffening up, add more powdered sugar a tablespoon at a time until it holds shape. For the bold decorator, a gentle hand and a fine, clean brush are all you need for those shining gold details.
- Keep your tools spotless for the brightest icing finish.
- If transporting, pack cookies snugly so gold accents aren't jostled off.
- Gold luster dust looks best on smooth, dry icing—never rush this part!
 Pin it
  Pin it
 Each Taurus Zodiac cookie carries a little shimmer and a lot of intention—perfect for when you want your treat to whisper, 'I thought of you.' No matter the occasion, these golden cookies will always bring a touch of the stars to your table.
Recipe Q&A
- → How do I prevent cookies from spreading?
Chill the dough well before rolling and keep the oven temperature steady at 350°F (175°C). Roll to an even 1/4-inch thickness and transfer cookies to the sheet with minimal handling to preserve edges.
- → Can I use meringue powder instead of egg whites?
Yes. Substitute 4 tablespoons meringue powder plus 1/4 cup water for the two egg whites to make stable royal icing with similar glossy peaks and good drying properties.
- → How do I get a smooth flooded surface?
Outline with a stiffer icing, then flood with a slightly thinner consistency. Use toothpicks or a small skewer to pop air bubbles and encourage even spreading, then let sit undisturbed until set.
- → Best way to apply edible gold detailing?
Mix edible gold luster dust with a few drops of clear alcohol (vodka or lemon extract) to make paint. Apply with a fine brush only after the icing is fully dry to avoid bleeding.
- → How should decorated cookies be stored and boxed?
Ensure icing is completely dry before stacking. Use parchment or tissue layers between cookies and a snug box to prevent shifting. Store in a cool, dry place up to several days.
- → How can I make these dairy- or egg-free?
Use vegan butter in the dough and replace egg with aquafaba for structure. For royal-type icing, aquafaba can mimic egg whites but test consistency, as drying times may vary.