 Pin it
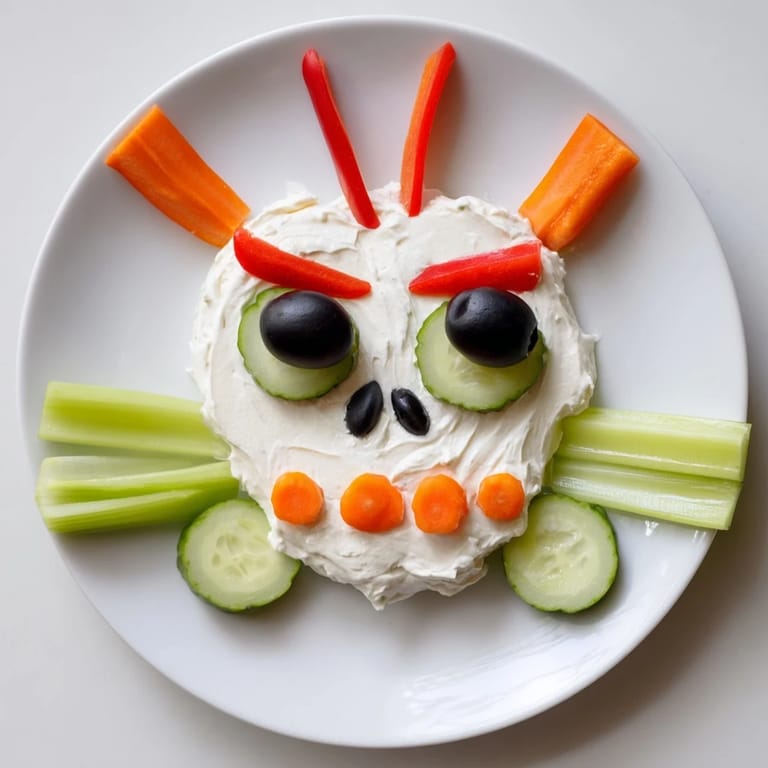
 I'll never forget the Halloween party three years ago when my nephew's eyes lit up seeing a skull made entirely of cream cheese and vegetables on the table. He didn't just eat it—he became the party's self-appointed protector, announcing to every guest that this was the most creative appetizer he'd ever seen. That's when I realized this playful spread wasn't just food; it was a conversation starter that somehow made Halloween feel a little more magical and a lot more delicious.
I remember prepping this the morning of a neighborhood Halloween gathering, and by the time I set it on the table, it had become the thing everyone gravitated toward first. The best part was watching people hesitate for just a second, charmed by the creativity, before diving in with genuine enthusiasm. It taught me that presentation truly is half the battle—especially when you're feeding people during a celebration.
Ingredients
- Cream cheese (8 oz, softened): This is your canvas. Softening it beforehand makes all the difference—cold cream cheese tears and resists shaping, so take it out of the fridge about 30 minutes before you start. It becomes your perfectly moldable base.
- Sour cream (2 tbsp): Just enough to loosen the texture and add a subtle tang that keeps the spread from being too heavy. It's the secret to making your skull smooth and spreadable.
- Garlic powder (1 tsp): Don't skip this. It transforms a plain cream cheese spread into something that actually tastes intentional and craveable.
- Lemon juice (1 tsp): A bright, acidic touch that lifts the entire flavor. It's subtle but absolutely essential.
- Salt and pepper, to taste: Season generously—bland dips disappear from the table untouched, but seasoned ones get devoured.
- Cucumber, sliced into rounds: These become beautiful pale tiles that fill in the skull's shape and add a fresh, crisp element.
- Red bell pepper strips: They're naturally vibrant and serve as the perfect mouth detail, adding sweetness and color contrast.
- Black olives, halved: The eyes of your skull—two perfect dark orbs that bring the whole design to life.
- Carrot, sliced and shaped: Use thin rounds for teeth and a small piece for the nose. Carrots add that bright orange accent and a satisfying crunch.
- Celery sticks or breadsticks (2-4 long pieces): These form your crossbones and become edible utensils for scooping the spread. I prefer celery for the authentic crunch, but breadsticks work beautifully too.
- Fresh parsley or chives (optional): A sprinkle of green on top adds the final touch of polish and freshness.
Tired of Takeout? 🥡
Get 10 meals you can make faster than delivery arrives. Seriously.
One email. No spam. Unsubscribe anytime.
Instructions
- Mix your base:
- In a medium bowl, combine your softened cream cheese, sour cream, garlic powder, lemon juice, salt, and pepper. Use a spoon or small spatula to blend everything until it's completely smooth with no streaks of cream cheese remaining. Taste as you go—this is when you adjust the seasoning to your liking. It should taste flavorful enough to stand on its own, not bland and forgettable.
- Shape the skull:
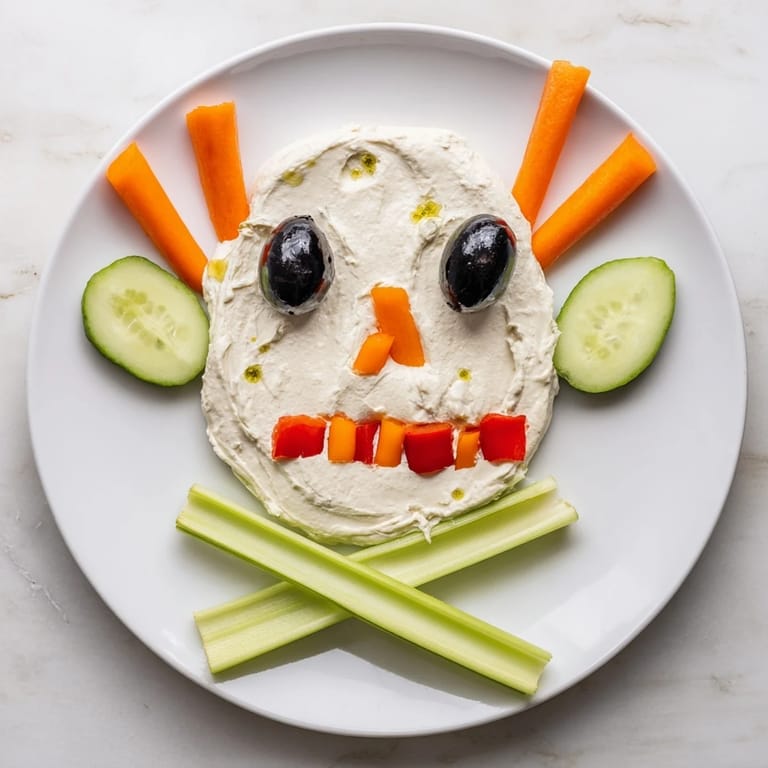
- On your largest serving platter, use a spatula to spread and mold the cream cheese into an oval skull shape. Think of it like frosting a cake—smooth, intentional strokes work better than frantic dabbing. Make it roughly 8-10 inches tall if you can. Don't worry about perfection here; your vegetable features will define the shape.
- Position the crossbones:
- Take your celery sticks or breadsticks and arrange them in an X pattern beneath the skull, letting them cross over each other underneath. This is where the magic happens visually—the bones anchor the whole design.
- Create the face:
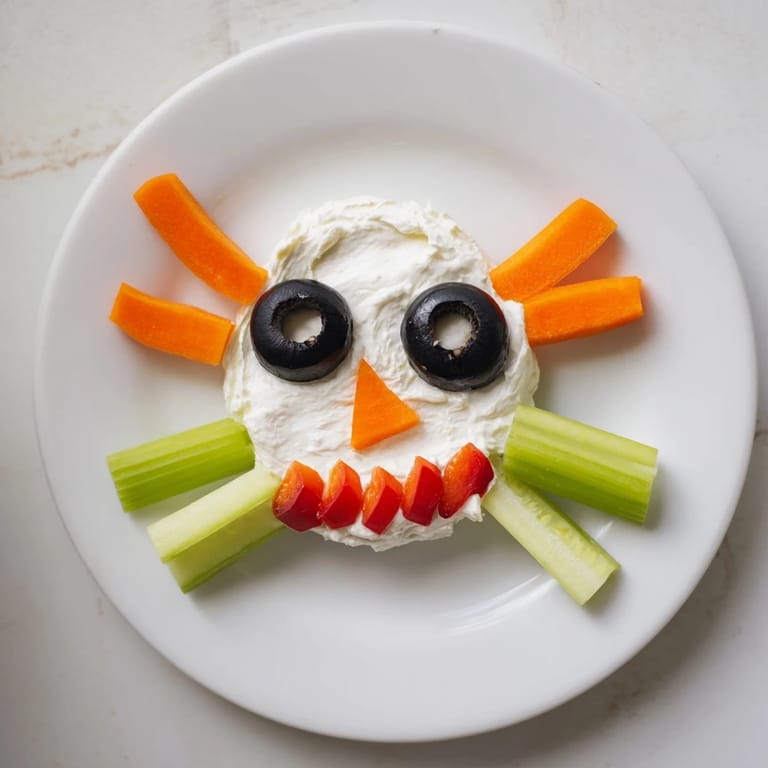
- Press your black olive halves into the cream cheese where the eyes should go, spacing them about 2 inches apart. For the nose, use a small carrot round or an olive slice in the center. Now comes the fun part—arrange your red bell pepper strips below to form a dramatic grin, and position your carrot teeth between the pepper mouth. This is where you get creative and make your skull truly unique.
- Fill and finish:
- Use cucumber slices, additional carrot rounds, and whatever other vegetable pieces you have to fill in the sides of the skull and add dimension. Layer them like shingles so they catch the light. The more you layer, the more professional it looks. Finish with a light sprinkle of fresh parsley or chives across the top if you'd like that pop of green.
- Chill and serve:
- Refrigerate until party time—even 15 minutes makes a difference in firmness. When you're ready, surround your skull with crackers, pita chips, or additional vegetable dippers. Your guests will absolutely lose it.
 Pin it
 There's something genuinely special about watching a simple appetizer transform into edible art. I'll never forget my daughter's voice at that Halloween party asking if she could take a picture before eating it—that moment made me realize this recipe does something beyond feeding people. It creates memories.
Make It Your Own
While the classic version is stunning, don't be afraid to personalize it based on what's in your kitchen or what your family loves. I've seen versions with roasted red peppers instead of fresh, with radish slices creating a pink-and-white striped effect, and even with tiny cherry tomatoes dotting the face for texture. The beauty of this recipe is that it's a template, not a strict formula. The vegetable aisle is your playground.
Timing and Prep Strategy
The genius of this appetizer is that you can do nearly everything ahead. Mix your spread the morning of your party, cover it, and refrigerate. Cut all your vegetables several hours in advance and keep them in separate containers. Then, about an hour before guests arrive, assemble the whole thing and let it chill. You'll walk into your party stress-free, and your platter will be the first thing people notice.
Why This Works at Every Celebration
This isn't just a Halloween thing, though it's absolutely perfect for that. I've made skull spreads for Día de Muertos gatherings, Day of the Dead parties, and even a medieval-themed event where it was somehow fitting. The magic is that it's visually stunning, completely approachable, and tastes genuinely good. People expect party food to either be impressive but mediocre, or delicious but boring. This hits both.
- Make a second skull if you're feeding more than 8 people—two smaller skulls create more visual impact than one large one.
- If you're worried about the spread drying out during the party, keep a small bowl of extra mix nearby to touch up any spots that look tired.
- Serve this early in your party while the vegetables are crunchiest and the spread is still perfectly cold and firm.
 Pin it
 This recipe reminds me that sometimes the most memorable food moments come from simple ideas executed with care and a little bit of creativity. Make this skull, watch your guests' faces light up, and know that you've done something right.
Recipe Q&A
- → What ingredients create the creamy base?
Cream cheese, sour cream, garlic powder, lemon juice, salt, and pepper blend together for a smooth, flavorful spread.
- → How are the skull features formed?
Sliced cucumbers, red bell pepper strips, black olives, and carrot rounds shape the eyes, nose, and teeth for a spooky effect.
- → Can this be made gluten-free?
Yes, by using celery sticks or gluten-free breadsticks to replace traditional breadsticks, keeping the version gluten-free.
- → What garnishes enhance this spread?
Fresh parsley or chives add bright color and a touch of herbal aroma as optional garnishes.
- → How should the spread be served?
Chilled on a large platter, accompanied by crackers, pita chips, or sliced vegetables for dipping and snacking.